All Articles
How to select all emails in Gmail

How to select all emails in Gmail

6
min read
Overview:
Overview:

Gmail includes a variety of convenient tools to help you manage your inbox. Even for diligent, organized Gmail users, though, it often doesn’t take long for the inbox to get out of hand. 

Sometimes, you need to manage many different emails at once. No one has time to click through and select each email individually, so what do you do? That’s where Gmail’s select all feature comes into play. 

Here’s how to select all emails in Gmail.
<div class="anchor-wrapper"><div id="why-select-emails" class="anchor-target"></div></div>

Why would you want to select all emails in Gmail?

You might want to select emails that meet certain criteria for many different reasons. 

For example, you can delete all the emails in your Promotions folder because you no longer need them. Some other reasons you may want to select many emails at once include: 

  • Forwarding all emails from a specific sender.
  • Adding a label to emails sent to a specific contact.
  • Deleting emails from a specific sender, or in a specific folder.
  • Archiving emails in bulk.
  • Adding emails to boxes in a Streak pipeline.

Whatever the reason, the select all feature allows you to select and take action on emails in bulk, saving you time and hassle.
<div class="anchor-wrapper"><div id="select-all-in-gmail" class="anchor-target"></div></div>

How to select all emails in your Gmail inbox

Let’s start with how to select all of your emails in Gmail. And by all, we mean every last email in your inbox. Here’s how to do it:
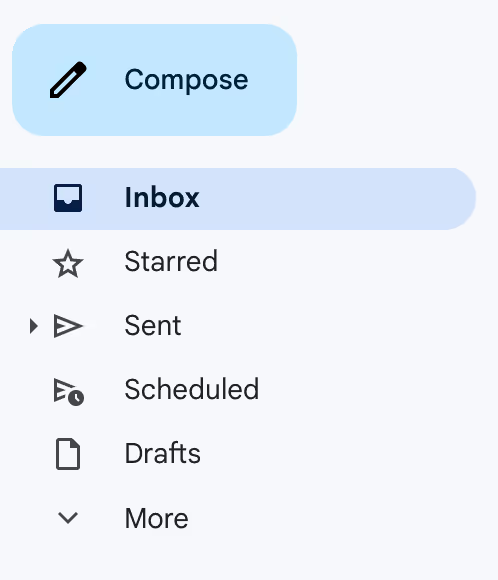
  1. In the desktop version of Gmail, head to the Gmail menu on the left-hand side of your screen.
A screenshot of the Gmail menu
Gmail left navigation menu
  1. Click the “More” option to expand the menu options. Scroll down until you see “All mail,” and click on it. 
  1. Click on the checkbox above the first email in your inbox. This will select all the emails that are displayed on the page you’re currently viewing.
  1. To select every email in your inbox, click “Select all ___ conversations in All Mail.” This will be specific to the number of emails in your inbox. This includes read and unread emails, archived emails, and emails in various folders within your inbox.

In this example, the user has 2,154 total emails.

  1. Once you click that, the notification will say, “All ___ conversations in All Mail are selected.” You’ll also have the option to clear the selection. 
A screenshot of the notification at the top of the inbox when you select All Mail
All emails selected - proceed with caution!
  1. Now, all your emails are selected, and you can move, delete, archive, or take another action on the emails.

<div class="anchor-wrapper"><div id="select-groups-of-emails" class="anchor-target"></div></div>

How to select groups of emails in Gmail

Most people won’t need to select all emails in Gmail often. Rather, you’ll want to hone in on a subset of emails in order to take action and organize your inbox. 

So how do you go about selecting certain email groups like unread emails or emails from a specific sender? Well, you can do that, too. 
<div class="anchor-wrapper"><div id="select-unread-emails" class="anchor-target"></div></div>

Select all unread emails

  1. Selecting all unread emails starts the same as selecting all emails in your inbox. Head to “All mail” from the menu on the left-hand side of your screen in desktop Gmail. 
  1. At the top of your screen, under the search bar, you’ll see options for filtering your mail. Choose “Is Unread.”
  1. Gmail will filter out all the emails you have already opened and leave you with only unread emails. Select all these emails by clicking the checkbox at the top left.
  1. If you have more unread emails than displayed on the current page, click “Select all conversations that match this search.” Doing so will select every last one of your unread emails, not just the ones on the current page. 
A screenshot of the example notification that appears at the top of Gmail inbox after clicking "All Mail" and then "Is Unread"
Select all emails, even if they're not displayed on the current page
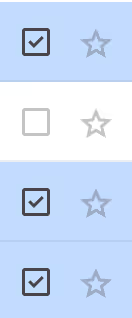
  1. From there, you can select all your unread emails and take any action you want with them. You can even exclude some unread emails from this selection by clicking the box next to those emails. Once the box is unchecked, it’s not part of your selection.
A screenshot of the boxes in the Gmail inbox highlighting the checked boxes
Fine tune your selection by checking or unchecking certain emails

<div class="anchor-wrapper"><div id="select-specific-sender" class="anchor-target"></div></div>

Select all emails from a specific sender

Now let’s say you only want to take action on emails that a specific contact has sent you. The process for selecting all those emails is similar, and here’s how to do it:

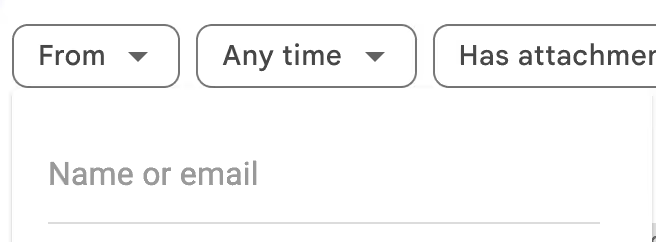
  1. Starting in the All Mail folder in desktop Gmail once again, click on the “From” option.
  1. A menu will pop up with some of your recent contacts, but you can also type in your contact’s name or email if you don’t see them on this list. 
A screenshot of the menu when choosing the contact email you want to see and the date it was sent
Type the name or email of a contact to select all emails with them
  1. Select the contact whose emails you want to view. All the emails from that sender will appear.
  2. Now, you can use the select tool to select all these emails. Click the checkbox to select all the emails on the current page. If you have additional emails from this sender, you’ll also see an option to select all the emails not on this page.
A screenshot of notifiation at the top f the inbox when all emails on the page are selected
Select emails beyond the ones currently displayed
  1. You now have all emails from that specific sender selected.

Follow these same general steps to select all emails that fit any other criteria, such as emails older than six months, emails to a specific contact, or emails with attachments. You can mix and match these filters until you only see the emails you’re interested in and then select them all with the checkbox.
<div class="anchor-wrapper"><div id="select-on-mobile-app" class="anchor-target"></div></div> 

Can you select all on the mobile Gmail app?

Currently, there is no option to select all in bulk using the mobile Gmail app. However, you can quickly select multiple emails to take bulk action on your mobile device. 

To select multiple emails in the app, tap the circle showing your contact’s avatar or initial. Once selected, you’ll see a check mark and the email will appear highlighted. 

A screenshot of the icons showing checked multiple emails on a mobile app
Tap your contact's image to select emails on the mobile Gmail app

Once you select multiple emails, you can take action on all of them at once.

This works well for managing incoming emails on the go, but you may want to stick to the Gmail desktop version when you’re ready for a major inbox overhaul dealing with 10+ emails at once. 
<div class="anchor-wrapper"><div id="actions-with-selected-emails" class="anchor-target"></div></div>
What actions can you take with the selected emails?

So you’ve dug up a specific group of emails in your inbox — now what? 

You can take any action on bulk-selected emails that you can take on a single email. Some popular options are:

  • Delete
  • Forward
  • Mark as read
  • Archive
  • Add a star 

Many of these actions can be completed in the toolbar at the top of your inbox.

A screenshot of the Gmail toolbar at the top of the inbox
The Gmail toolbar at the top of your inbox

Click the three vertical dots for more options, and select whichever fits your needs.
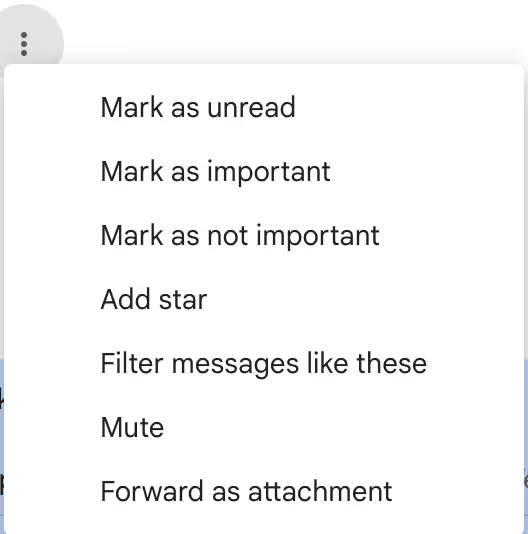
A screenshot of the 3-dot menu on Gmail inbox
Actions menu for emails in your Gmail inbox

<div class="anchor-wrapper"><div id="track-emails-in-pipelines" class="anchor-target"></div></div>

Track emails in pipelines in Gmail

If you have the Streak extension installed in Gmail, you have one more powerful option for your bulk-selected emails: adding those emails to a pipeline. 

Adding emails to a pipeline allows you to track all your contacts, leads, and opportunities through the processes they’re involved in. 

For example, you can select all applicants for a job and add them to your hiring pipeline. Or select people who have responded to your sales outreach and add them to a Sales pipeline.

Follow these steps:
  1. Install the free Streak extension for Chrome or Safari (just click the orange button at the top of this page!)
  2. After selecting the emails you want to add to a pipeline, click the orange “Add to Pipeline” button in your Gmail toolbar.
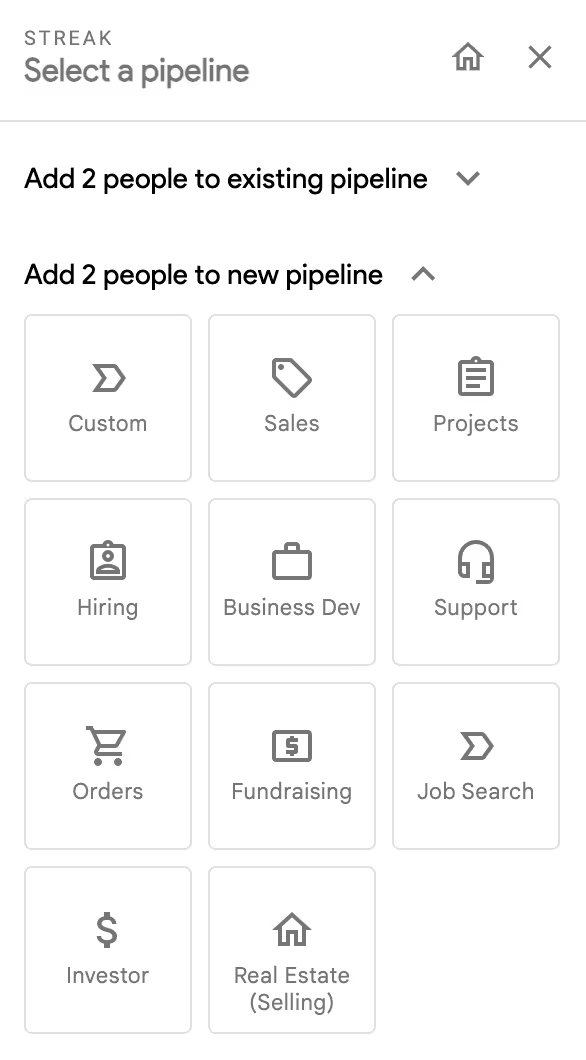
  1. You then have the choice between adding those emails to an existing pipeline or creating a new pipeline to add them to. If you don’t already have a Streak pipeline, you can create a new one in minutes using a customizable pipeline template.
A screenshot of the Streak template when creating a pipeline
Track emails in a new or existing Streak pipeline
  1. Streak will automatically create a new box for each selected email in your chosen pipeline. It will import their contact information and pull in other emails from those contacts, helping you keep track of all your communication with them. 

This feature is especially useful for tracking things like support tickets, job applications from candidates, and responses from sales leads. And you can do it all right from your Gmail inbox in minutes!

<div class="anchor-wrapper"><div id="manage-inbox" class="anchor-target"></div></div>

Take the hassle out of managing your inbox

Save time and effort by using the select all feature in Gmail to bulk-select emails. Stick to desktop Gmail for selecting more than 5-10 emails at a time, and play around with the search and filter features until you find the emails you need. 

From there, delete, forward, or archive the selected emails with just a few clicks. Or, add those emails to your Streak pipeline to track contacts, deals, and more.

We're hiring

Come build something great with us.